1932 Ford 5-window Coupe
Build-Up
From Bill Neumann
Camarillo, CA
December 2010
Page 8
On the last post, I brought the Coupe to Mike Harper’s Custom Interiors in Paso Robles, CA.
After deciding on the upholstery color (black leather), look and details, the first step was to install the Dynamat® sound deadening and insulation material.
I had heard a lot about Dynamat®, and after installing the first piece, right away you could tell the feel was solid, and tapping on the sheet metal was a dead sound – no more tinny, metallic echo like you find in all the early cars. And the insulation is very important to me because the Coupe is old style – no air. And no electrics/computers – just handles, a distributor and carbs.
The ’32 coupe is very small on the inside to begin with, and mine being chopped and channeled it really shrinks down in size. Because of this and all the little nooks and cavities, we found it much easier to work with smaller pieces rather than trying to install a large section.
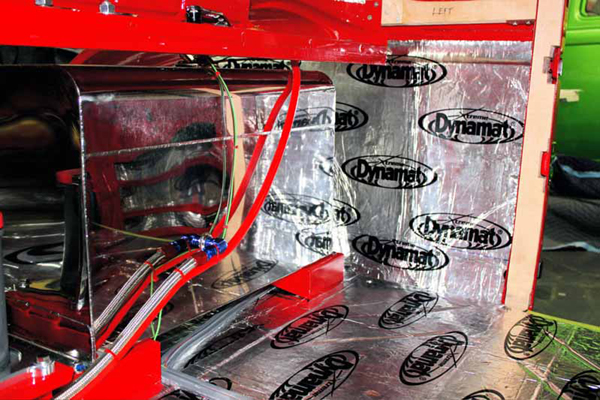


The Dynamat® has some very aggressive adhesive under the aluminum film top layer, so you don’t need to worry about it coming loose on the roof or vertical panels – very important if your car should sit in the sun at a show or driving on a hot day. So once you touch a piece to your metal, its down – contact! No more adjustment so fit and cut carefully.
We measured and marked each piece with a Sharpie® marker for a particular area and cut to fit. Of course you want to make a trial fit with the special paper still on the adhesive side. Dynamat® is real easy to cut with scissors. The flat areas are easy to do, so take a look at the transmission hump. We measured out a square that would cover the area, and then formed it around the hump edges. Holding it in place we marked around the shape, cut it out, and made a trial fit.


When everything looked good, we pealed the protective paper, and carefully laid it in place. We did some smoothing by hand on the curved edge at the floor and then used a roller to smooth it all out.
Before taking the coupe to Mike, I installed the Ron Francis Wire Track with double sided carpet tape and ran all the wires from the tail lights forward. The Wire Track really worked great and made a neat job of getting the wires up front.
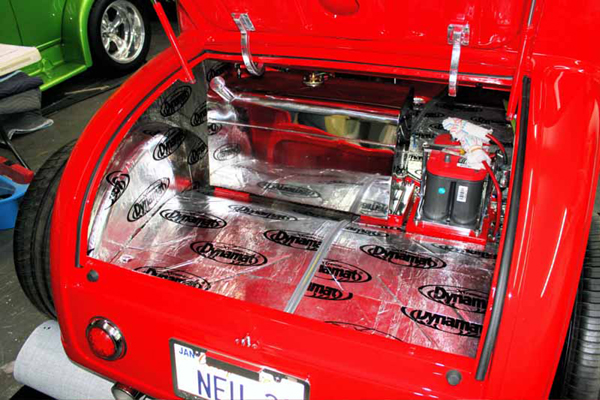
The Dynamat® is butted up against the Wire Track, and Mike will install a matt also butted up to the Wire Track. This will make a smooth carpet without any lumps. Also, before installing the custom Rock Valley SS gas tank and battery tray, I put down a piece of Dynamat® underneath just beyond the outer dimensions – then Mike worked around these parts easily. The wires hanging down up front where temporarily left that way so Mike could cover the cowl and firewall easily. Now I’ll neatly finish the wiring, and Mike can get on with the upholstery.
The next installment I will show the finished upholstery, and the radiator/grille installation. So check back on HRHL to see the finished Coupe build.