.jpg)
In the last issue, we discussed tonneau covers for your shop truck. They're definitely a cool deal and not only do they look good, they provide protection for the various race car or hot rod parts you're carrying (not to mention groceries, suit cases, coolers, and everything else you might be hauling). They can also improve fuel economy (we're testing this one and down the road, we'll provide you a before and after average of our fuel consumption - this will be over time so that we can nail down some real world figures).
To recap, we went shopping for a soft tonneau that fit as flush as possible with the bedrail and at the same time, provided easy access to the bed and simultaneously proved easy to remove if necessary. It also had to have reasonably good weather sealing, too, considering we live in the Wet North West. Not exactly an easy bill to fill, but we found our tonneau at a company called Craftec out of Texas (http://www.crafteccovers.com).
Last issue, we shoed how Craftec builds an ingenious framework out of aluminum extrusions. It really is a clever arrangement, and assembling it is something pretty much anyone can do in his or her own garage (easy for seasoned hot rodders and racers!). We ended showing you how the cover framework was test fit to the bed of our GMS Sierra. Here's how the rest of it goes together (and if you want to view Craftec's install video, try this link: https://www.youtube.com/watch?v=zJgiVjLuN6A).

Disassemble extrusion number 1. You’ll see that it is a two-piece job – one side has two-side tape on it. That part has to be fit to the top of the front truck bed rail.

The hinge portion of the tonneau (shown above) is text fit next. We put a piece of tape on each end of the bed rail and marked the location once centered.
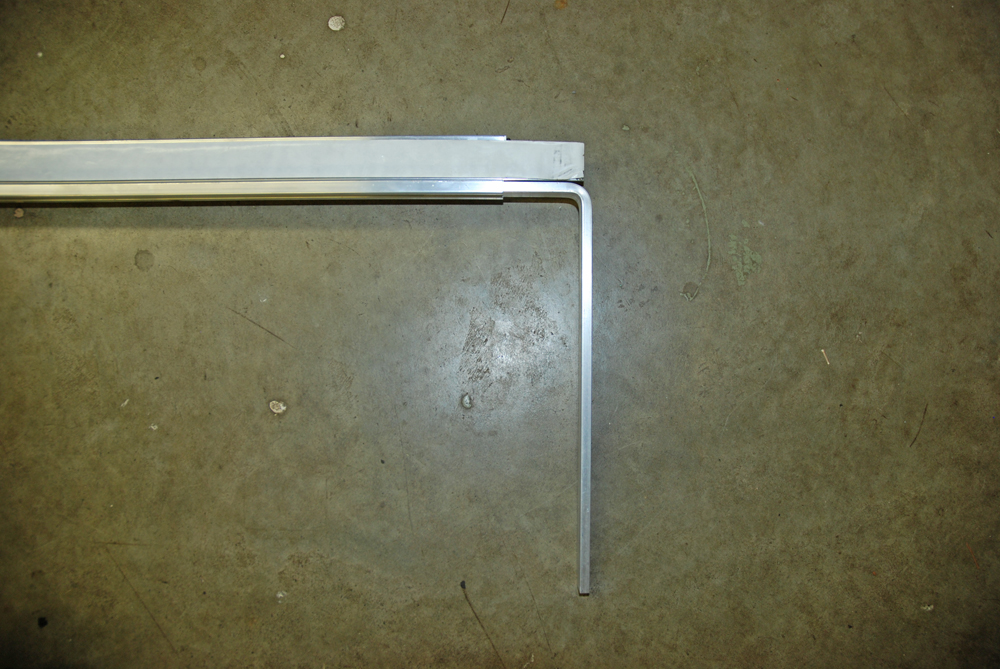
Front “L” brackets are installed next. The short end fits into the hinge portion of the tonneau rail system. They simply slide into the extrusion.


Next, you have to clean the top of the box rail where the hinge segment of the tonneau attaches. Craftec supplies you with a small package including an alcohol swab. The idea is to remove all grease and oil from the box surface.

Align the front hinge bracket with the tape marks. Peel the backing off the two-sided tape and press down. Be careful! You won’t move it easily if you make a mistake.

Each of the front “L” brackets are clamped to the side of the bed rail by way of a set of extrusions. The clamp extrusion is notched, two-piece job, which allows it to index to the bed rail. Once tightened, it’s locked in place. Very clever.

Four plastic corner plates are installed (they’re marked with regard to orientation and install by way of a self tapping screw). Next, the leading (forward) edge of the vinyl cover is pulled through the front framework extrusion.

Sides are next. The tonneau vinyl cover is manufactured with a thick plastic piece on each side. That plastic piece tucks into the receiver groove on the side rail. Take your time! It fits. Additionally, this photo provides a good look at the black plastic end plates. They lock in place once the fastener(s) is tightened.

Follow the same process with the end (tail gate side) extrusion. As the vinyl cover stretches out, it definitely becomes more difficult to install into the receiver groove. We found that by carefully using a heat gun to warm up the plastic, it went on easier.

With the tonneau upside down, install the corner weather-strip as shown here. It makes use of two-side tape. You’ll have to trim to size (no big deal – sharp scissors work).

The pair of gas struts install as shown. The bracket for the bed rail is similar to the bracket used for the front L-brackets. It’s designed to clamp on the bedrail. We had to play with the location a bit to get the height we needed. And by the way, Craftec even supplies a little screwdriver so that you can quickly remove each of the struts when the time comes to take off the tonneau.

Here’s how the latch system works. As you can see, it’s dead simple. And very effective. Need adjustment? Add or subtract washers.

We’re done! As you can see, it’s actually a straightforward install with no drama. Bottom line? Craftec makes a very clever cover. When it’s all said and done, we dig it (a lot!)!