A trailer alarm may seem like just another horn-blowing device that just irritates people in the area when it goes off. However, this Pro-Tec trailer security system from Trailer Alarms in New Braunfels, TX offers five different ways to alert you to someone trying to move or break-in to your parked trailer.
On the basic system an accelerometer in its control module sets off a loud siren, flashes the running lights and sets the trailer brakes if someone moves the trailer. It has a sensitivity setting feature that lets you control how much movement is needed to trigger these functions.
Two additional options set this system apart from most other alarms. The first is a transmitter that sends a page to you if the system is activated. It can also be used for paging others in a race crew via the optional keypad if you want them to return to the trailer.
The second option is a system that sends a text to your cell phone if the alarm is activated. The pager only works for up to a one-mile radius but the cell phone text range is unlimited. Both however, free you from having to keep the vehicle in sight at a restaurant or from your motel/hotel room.
I recently completed the building of my roadster and needed to take it on a long trip around the country this summer. The recent surge in thefts of vehicles in trailers prompted me to search the market for a trailer alarm system that would offer some real security for my rig. I chose this system because it offered a variety of features at a reasonable price and was easy to install. The accompanying photos show the installation and features of the system that I chose.

The basic Pro-Tec system includes this control module, a siren, three spring-loaded pin-type door switches with mounting brackets and screws, brake safety toggle switch, two transmitters (key fobs), crimp connectors and one double membrane entry seal for the wiring. Upgrade options include: a 1-mile radius pager, a cellular (texting) notification system, an interior keypad and other minor accessories.

A roughly 6x4x3 inch control module houses the electronics that orchestrate all of the functions of the alarm system. Shown here is the optional, larger control module (7-inches wide) with the brake activation/deactivation toggle switch already installed in the left end of the box. The double membrane entry seal for the wiring can be seen in the lower left corner.

A single printed-circuit board holds all of the electrical components, fuses, wiring termination points and the antenna for system activation, located at the far right end of the board. This optional longer version of the box already has the brake control switch installed, at the left, eliminating the need for its installation somewhere else in the trailer.

The control module mounts via self-drilling screws (included) through holes at the bottom of the threaded holes for attaching the control module cover. It should be mounted as high as practical inside the trailer to optimize reception of the signal from the system activation key fob.

Three spring-loaded pin-type door switches are provided with a long adjustment range to allow for different door configurations. A shielded crimp connector for each switch is also included.

Mounting brackets for the door switches are threaded to facilitate adjustment and have long slotted mounting holes to allow their movement in or out from the mounting location. Self-drilling screws are provided as part of the hardware package.

The side door was relatively flush with the frame so I was able to use the bracket flat as supplied. The rear ramp door had a recess that necessitated the bending of the bracket to provide sufficient range for adjustment of the door switch.

Switch bracket for the rear ramp door fits into the recess and I secured it with the provided self-drilling screws. Four screws are not necessary but I chose to add the others at the right end of the slots so that the bracket could not move to the left should something inadvertently come into contact with it.

The door switch can be adjusted in or out in the threaded bracket and locked in place by the nuts. A 20-gauge wire is recommended for routing from the door switches to the control module. It is attached with this insulated push-on crimp connecter.

Wiring for the door switch is routed to the control module through Legrand Cordmate II, a plastic cord routing system normally used for routing cords in an office. I purchased the necessary pieces to route all of the wires at Lowe’s.

This is the siren and bracket supplied in the kit for mounting outside the trailer. It is weather resistant and is usually mounted beneath the trailer in an inconspicuous location.

I mounted the siren onto the frame tube beneath the front of the trailer where it was easiest to route the wiring back through to the control module. Red wire goes to the connection point in the control module and black to chassis ground. Siren should face downwards to prevent the collection of water in the cone area.

I chose the system with the pager that notifies me when an alarm has been triggered via the pager that clips to my belt. A transmitter (right) is mounted inside the trailer and connected to the system with the supplied wiring harness. The harness looks like it has a lot of wires but only uses three for this application so the connection process is actually very simple. Pager (left) has a transmitting range of up to one mile; more than enough to allow leaving the trailer unattended while you are in a restaurant or motel room.

A standard AM/FM antenna (not included) is needed to transmit the pager signal. I purchased this one directly from Trailer-Alarms, but you could source one from your local parts store if you find that more convenient.

I drilled a hole through the right front corner of the trailer and installed the antenna base per the instructions included with it. The higher the antenna is mounted the longer the range of the signal will be. Rubber seal at the base of the antenna assures that it remains watertight.

Fiberglass antenna mast screws onto the base. It would be less vulnerable if it was mounted lower but that would reduce the transmission range of the pager transmitter.

Wire from the running lights to the control module needs to be T-ed into the wire on the hot side of one of the lights. Black wire is a ground. I prefer this kind of crimp T-connector because they are more secure than the cheaper ones that clamp over the wire.

Good quality electrical tape should be wrapped around the connection. Wires from the lights, door switches and the antenna are routed through Legrand Cordmate II at this awkward angled-corner of the roof.
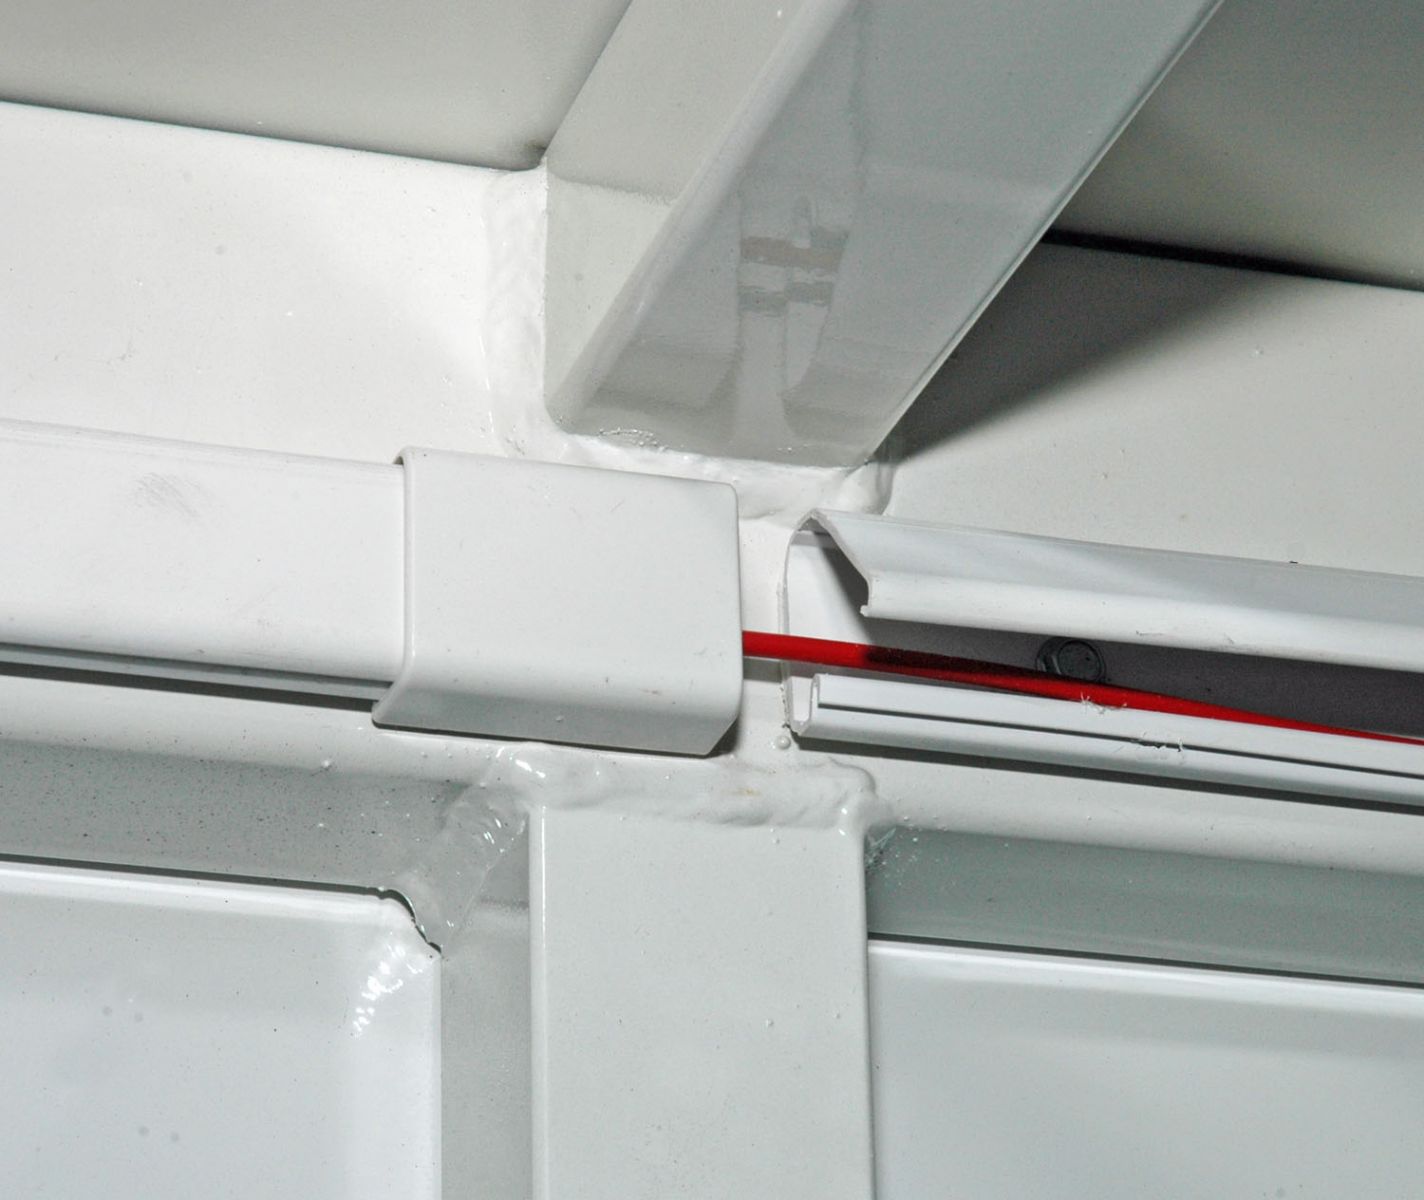
The Legrand Cordmate II channel has double-stick tape for mounting but I chose to secure it with a screw at each end of a run. Channel snaps closed after the wires have been routed through.

My aluminum box trailer has no interior paneling because this helps hold down the weight but necessitated running the wires through the plastic channels rather than behind the inner walls. Snap-on covers connect the sections of channel together.

A standard car battery (not included) is needed to power the alarm system. A shelf at the front of my trailer made a convenient location for installation of this accessory battery box. This battery-post clamp, with wing nut is a good way to attach the 12-gauge wire from the positive pole to the control module. A standard ground cable connects the negative post of the battery to the chassis and provided a point for connection of other ground wires in the system. Battery should not be connected to the charging system as this might damage the sensitive electronics. The system draws very little current so charging the battery once a year is more than adequate for maintaining a charge.
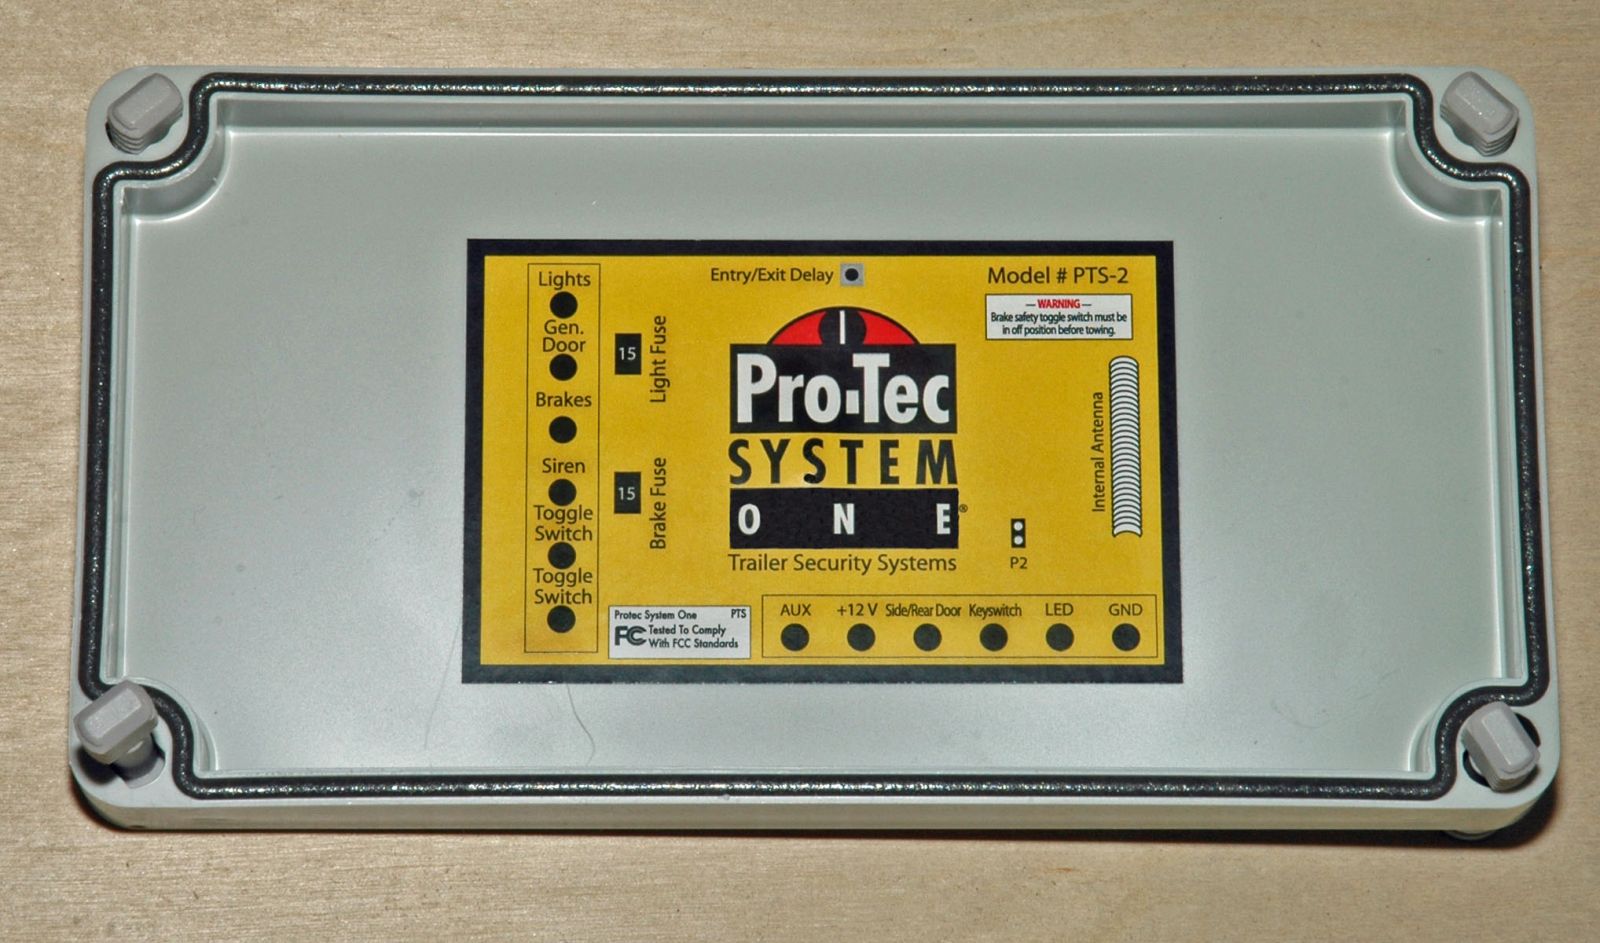
Connection of the wiring in the system mainly routes into the control module box. This decal inside the cover of the box makes the initial wiring easy to follow and provides a guide should there be problems with the system in the future.

Wiring is routed into the control module box through the double membrane entry seal and the stripped ends are inserted into their respective slots, then the locking screw tightened similarly to the way it is done in a power panel in a house. All of the connection points are clearly labeled on the circuit board.

One siren (previously shown) is supplied with the system; however I chose to install another one inside the trailer to further deter anyone that might break-in. This style is available for use inside or outside.

Instructions for wiring this optional siren are located on the back of the unit. As you can see it also emits 115db like the other model. Enough to drive almost any intruder out of an enclosed trailer.
.jpg)
All of the main components: control module, pager transmitter and siren mounted easily to an aluminum panel that I fabricated. My trailer has no interior paneling to save on excess weight so there was no paneling to mount things to. Battery box is conveniently mounted close by on the shelf. Clamps will be added on the panel to support wiring harness when the routing of wires is completed.

One of the available options is this red LED that indicates the alarm status visually from outside the trailer. The red wire connects to the terminal marked LED on the printed circuit board inside the control module. Black wire goes to ground.

The two key fobs included in the kit are used to activate or deactivate the alarm system. They come preprogrammed and instructions are included should you need to reprogram them at a later date. A keypad that mounts inside the trailer is also available as an option.
A good insurance policy will get your money back if someone steals your hot rod, custom, race or classic car, but that is no substitute for the time and effort that you have invested in it. Installing a good alarm system in your trailer at a fraction of the cost of the vehicle you are transporting in it is a no-brainer. This system, Pro-Tec PTS-2Plus from traileralarms.com, gave me peace-of-mind when I had to leave the rig unattended for long periods while traveling around to events this summer.
Source: Trailer-Alarms.com