.png)
By Tommy Parry
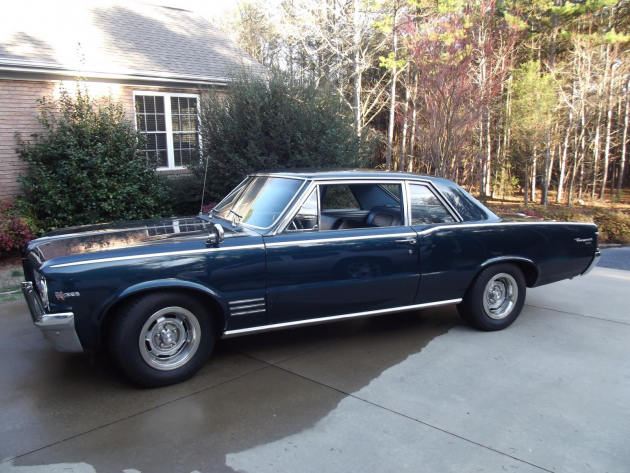
After catching a glimpse of a pro-touring-spec ‘65 GTO, Dave became obsessed—he knew he’d have to have his own car in this particular style. He’d had a '66 SS396 and another '65 LeMans in recent years, but he wasn’t set on using those models for a new build. Instead, he’d always wanted a '64 Tempest and decided this might be the right time to try that platform out.
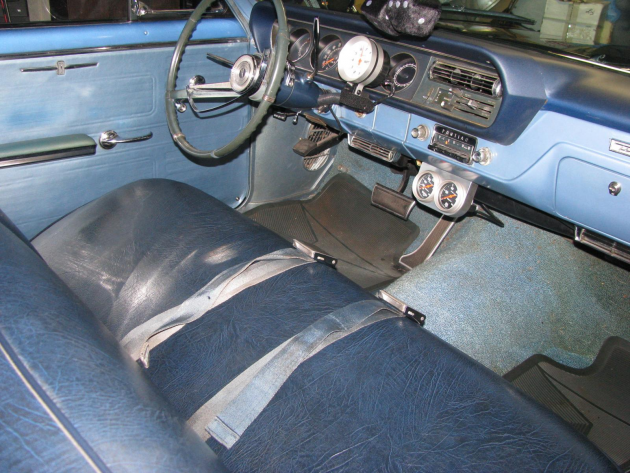
After a little searching, he found himself a rust-free car that had spent most of its life in the care of one woman in Georgia. The car came with a 326 and an AT on the column with PS, PB, and AC. It even had its original paint when it was sold by the original owner’s family and brought to a suburb outside Atlanta to start its second chapter.
The second owner installed a Eaton 4:10 posi, a fresh '66 389 with tri-power, and a 700R4 transmission. With all these modifications, plus a straight, corrosion-free body, it was the ideal candidate for a pretty extensive build.

Dave’s list of aims was short. He wanted a budget-friendly pro-tourer that would be reliable, would have decent fuel economy, could be driven anywhere, would haul his family and their gear, and would handle as well as a '64 Pontiac could handle.
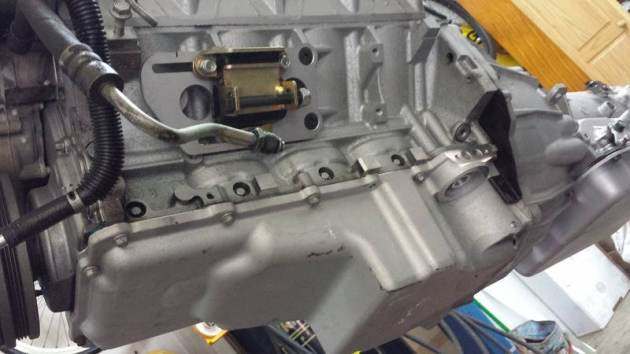
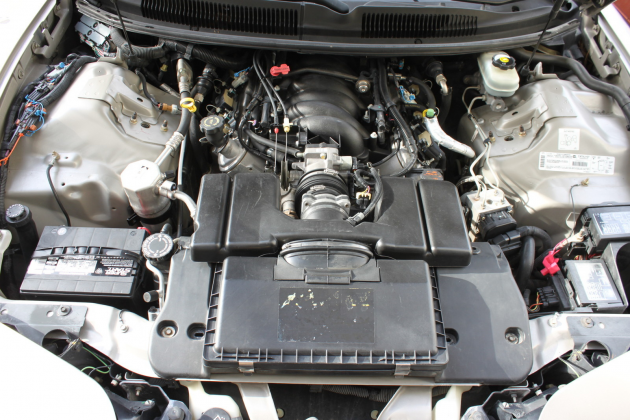
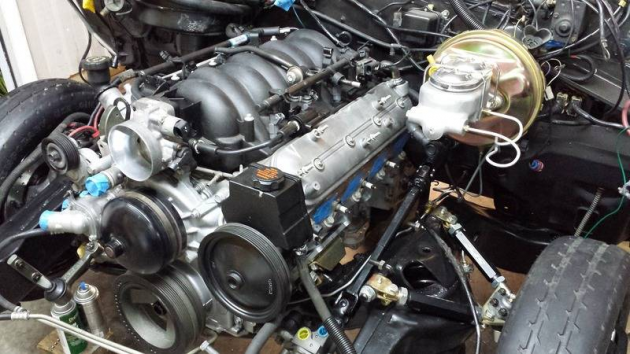
It had to have some power, too. After pulling an LS1 and a 4L60E from a WS6 Trans Am, he had his new powertrain upgraded with various performance parts including a YANK Stealth 2800 stall converter for the 4L60E, a TransGo HD2 kit, a B&M tranny cooler 70264, a Comp Cams 228R cam, PAC valve springs, TFS pushrods, a GMPP oil pump, an LS2 timing chain, and the usual freshen-me-up items.
A Quick Performance 9" housing/axle package would help utilize the newfound power, and the Baer 13” GT front brakes would allow Dave to get a little eager on occasion without worry.
But of all the first-stage upgrades, the chassis modifications were what excited Dave the most. With an ABC Performance Frame Boxing Kit and SC&C AFX Performance Suspension Package, it would be as taut as he needed it to be. The foundation had been set—now it was time to begin grinding.
The first order of business was getting the frame in shape. He pulled the frame, inspected it, stripped it bare, and pressure washed it. Much to his delight, he never eyed a single spot of rust.

After cutting the tranny mounts and sticking on an Autokraft oil pan, he finished boxing the frame. Next item to arrive on Dave’s doorstep was a Tanks Inc. kit with a sumped submersible fuel pump for his new factory tank. Welding the tank’s thin material was a chore, and though the finished product wasn’t much to look at, it worked.
Then came time to assemble the Quick Performance 9" rear, which he’d decided to run with Richmond 3.50 gears and a new Detroit TruTrac posi. Doused in gunmetal gray and bolted to a set of Currie control arms and Varishock coils, it certainly spruced up the rear end.
Getting the suspension installed wasn’t too challenging a process. The lower control arms went in with the bump-stop and coil spring seat already installed with supplied hardware and Loctite. He had to verify he had the proper orientation of the spring seat so that the top of the spring seats correctly into the top frame pocket. He also had to clearance the lower control arm holes for the spring seat bolts.
Dave then bolted in the uppers in the correct orientation with the ball joints in place. He did have to cut away some metal on top of the frame to make room for the upper arm travel as others have had to do.
.png)
Up front, Dave bolted the AFX spindle to the lower control arm, then installed the spring and jacked the lower control arm up into place. Following that, he installed the hardware, cotter pins, optional steering arms, and the new LEE 670 steering box.
Turning his focus back to the motor, he realized that the Autokraft pan that he bought would not fit without major clearance issues. Dave ended up selling it on the Pro-Touring.com forums and buying a new Holley retrofit pan with additional front clearance.
And then Dave started setting the engine and tranny in place. With the help of Stokers Rod Shop adjustable LS swap plates and a set of Prothane motor mounts utilizing the included spacer/support plate, he had what was needed to secure it, but getting there was tough.
This step took numerous fittings to get it exactly where he wanted, and he very liberally massaged the front of the transmission tunnel to fit the 4L60E. After a few hours of wiggling and cursing, the engine was mounted back within 1 ½” of the firewall.
The only subsequent issue in this department was an easy fix. Because the alternator or compressor wouldn’t clear sitting this far back and down, Dave had to purchase the new Holley accessory drive relocation brackets. But offsetting this minor hangup were the facts that he was able to re-use the factory F-Body trans cooling lines with no interference issues, as well as attain great driveline angles and good clearance on the cross-member and the tie rod ends.
Dave’s since put this build on hiatus, but for more information about getting to this point and where he hopes to go with it, visit his build thread here.
a
Imgupload: